
For reasons that make perfect sense to me (and probably only to me) I’ve been trying to get a 70 year old (or more!) bucksaw back in working order:
- Old Timey Saw Blade
- Old Timey Saw Blade: Part 2
- Old Timey Saw Blade: Part 3
- Old Timey Saw Blade: Part 4
- Old Timey Saw Blade: Part 5
- Old Timey Saw Blade: Part 6: SUCCESS!
As with all things Curmudgeon, it was harder than it looked. After careful research I found out it’s more or less impossible to buy a new version of the old blade. I didn’t want to spend 40 (or triple that!) man hours learning how to sharpen a decrepit saw so I went with a compromise. I installed a perfectly good but far less macho modern bow saw blade. [Note for the pedantics among us, there is a “bucksaw” (or buck saw) and there’s a “bow saw”. The two are functionally identical but built differently. Also, for the sake of linguistic awesomeness I’ll note that I need a “saw buck” for my “buck saw”. And yes, I’m the kind of guy that will eventually build one if only ’cause it sounds cool.]
Step 1: Amazon you crazy bitch, I love you like a drunk loves his liquor. I know you’re a corporate monopoly but I love ‘ya just the same. Also, UPS is my BFF but would you quit punching holes in my boxes?
Step 2: Bubble wrap for saw blades? Something tells me I’m an outlier in a world meant for shipping iPads and Siris.
Step 3: I was absolutely expecting this thing to be rusted all to hell. Before I even tried it, I gathered a can of WD40 and a few pliers. To my shock and amazement it loosened by hand. Also to my surprise, the pins that I expected to be irreplaceable and hard to remove simply dropped to the floor. Gravity gets all the press but tension is an impressive force too.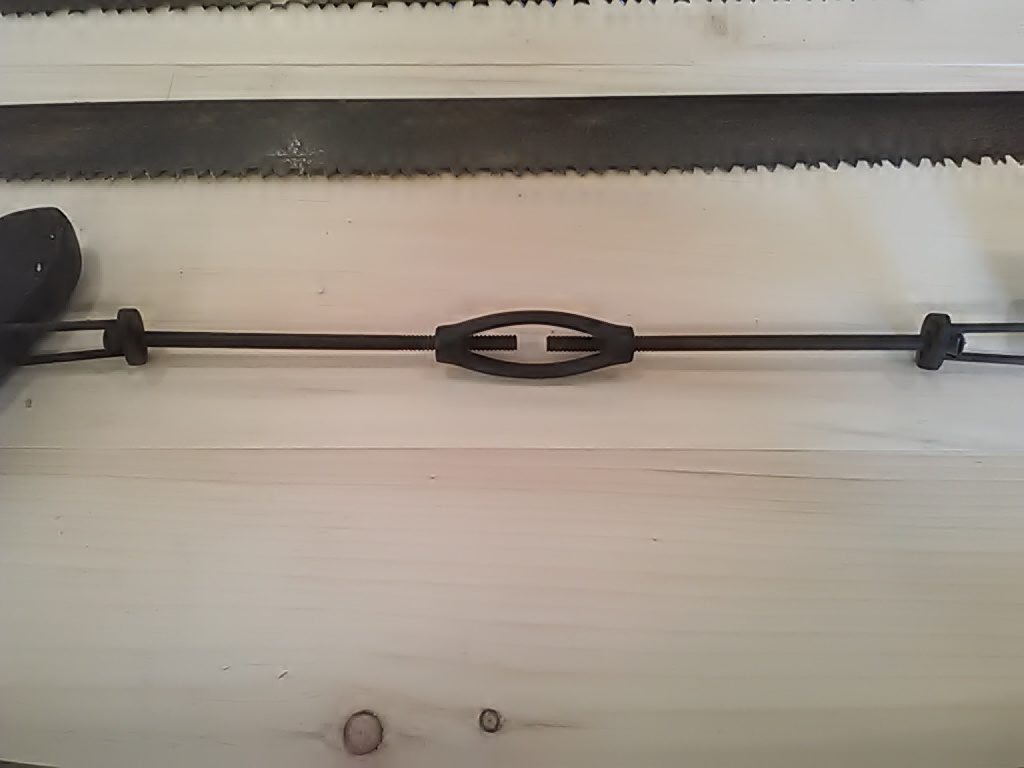 Step 4: The old blade was super huge and that’s why I wanted to keep it. The teeth are identical on the new one except there are 4 cutters per raker instead of 2. Both are bi-directional. This is how saws are made in San Francisco. Just kidding! It means the saw will cut forward and backward; it’s meant for chewing roughly through a lot of wood, not finishing the tenon on your fine furniture project.
 Step 5: I tested it out, whacking several chunks of scrap hardwood and also some firewood into small pieces. (It was cold out and Betsy needed food.) It works just fine. My only complaint is that the heavier bucksaw can twist the puny blade more than a lighter bowsaw. Then again the heavier bucksaw frame is a little more aggressive for just tearing wood fiber. I give it a solid B+. Not bad for $11 (link). Also, I feel satisfied because my saw hanging on the wall is totally functional… not just decoration. It’s never a bad thing when you’ve learned about and preserved a fading skill or technology. I call it a win!
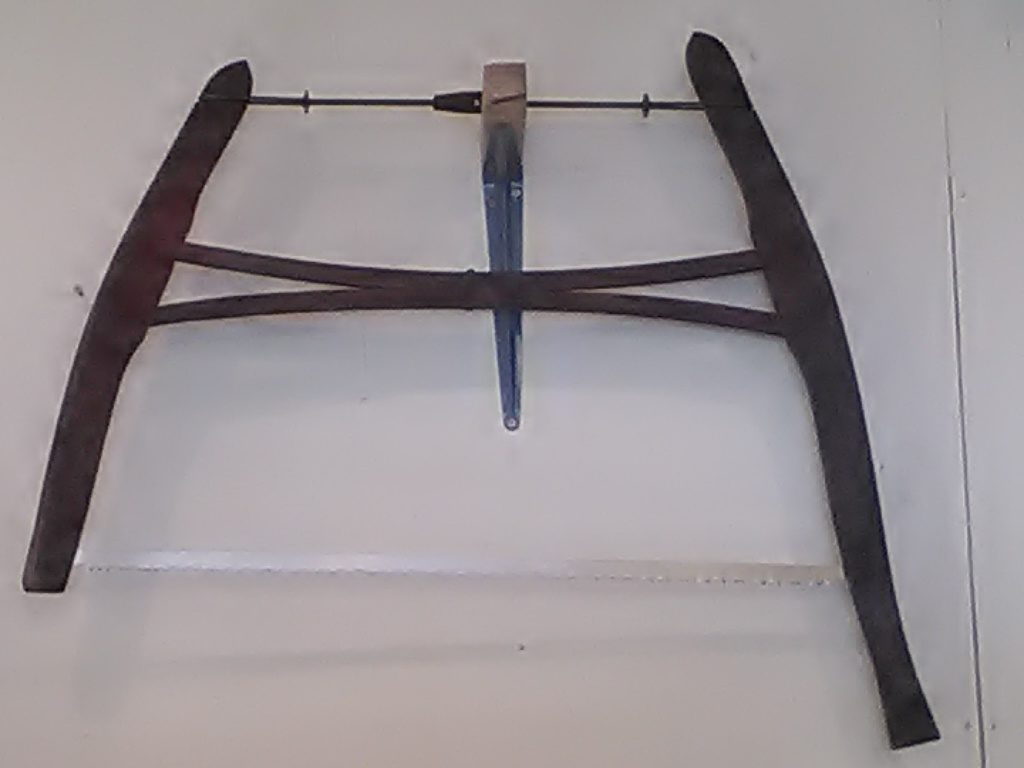
An innocent question: if the prospect of the whole Kung Fu grasshopper thing of learning to sharpen the old blade is too daunting, why not send it to a blade sharpener?
That’s my plan. It’s just on the back burner for a while. Finding a sharpener either locally or on-line is not as easy as an Amazon order.
“…finishing the tendon on your fine furniture project.”
(Pedantic Man’s eye is twitching…)
https://en.wiktionary.org/wiki/tendon
https://en.wiktionary.org/wiki/tenon
It’s a “tenon”. Why didn’t someone tell me?
Most of my background is of the subtlety associated with lag bolts and big damn nails (also all hail the self tapping torx screw!). In the interest of self betterment, I’m trying to expand my horizons. I’ve been muddling about with some older woodworking skills and it just always sounded like tendon to me. I had no idea that it’s a “tenon”. I can’t believe I didn’t know that.
Thanks for the input. I stand corrected!
Watched my grandfather sharpen his with nothing more than a thin triangular file. He wouldn’t remove the blade from the frame, just held it between his knees upside down. His blade did not have rakers, just alternating cutters. As he got older I started taking over the job of bucking the stove wood. A couple of hours work a week would be enough to keep the stove going except in the worst weather.
Hell….even *I* learned something from my Pedantry: “2.(construction) A wire or bar used to strengthen prestressed concrete.”
Can you say Florida Bridge Collapse?
Except that was post-stressed, not pre-stressed. Pre-stressed concrete has wires run through the concrete form before the concrete is poured. Those wires are then put under tension. The concrete then gets poured, and after it cures the ends of the wires are cut, leaving the strands embedded in the concrete under tension. Post-stressed concrete, like the Florida Bimbo Bridge, have hollow tubes cast in the concrete. A rod is run through the center of the tube and is anchored at one end in the concrete and is free at the other end. After the concrete cures, a tool is used to stretch that rod, after which that free end is anchored so it cannot shrink back to its original length. Not the best description of the process, but hopefully close enough, and it does show the difference.
And here I was thinking in terms of “Stress added to the structure prior to completion of it’s construction”… a task which both systems would accomplish, albeit in different ways.
Not that I am wanting to lead you down the primrose path or anything like that and cause you to disappear down a rabbit hole to emerge months later as a sort of Guru of saw sharpening but this might be of interest (scroll down below the boat picture header):
http://www.mcssl.com/store/hhpaysoncompany/books-by-dynamite-payson/keeping-a-cutting-edge-saw-filing
You KNOW you want to, eh? >};o)
Oh my God. That whole site is like crack to me! I had to click away before I bought the saw book and then got into lapstrake boatbuilding.
I’m gonna’ put that site on the backburner for when I have more time because yes I want that book and yes it’ll burn 1,000 man hours as soon as it arrives.
Late to this as I’ve been Intarweb-less for a short while but check out the Internet Archive (https://archive.org/). Quite a few older books on saw maintenance/filing for download.
https://archive.org/details/texts?and%5B%5D=saw+filing&sin=
I’d wager you can find something that’d help you learn to DIY.
Thanks for the info. I’ll probably avail myself of it in due time.
This particular project I was trying to avoid “going down the rabbit hole”, which (to me) would mean spending 150 man-hours mastering esoteric skills to resurrect the functional equivalent of a $20 bow saw. I narrowly escaped the clutches of my own curiosity when I stuck a replacement blade on the bucksaw and it worked fine. Whew!
However, I’m like a moth to flame. I didn’t “escape” my curiosity so much as “pique but belay”. I’ve added “learn how to hand file an antique saw” to my bucket list. When I have time (!) I’ll check out the books you mention. Then I’ll get myself some files and have at it.