My snowshoes were bought in Kittery Maine about 35(!) years ago. I don’t know if the store still exists. I barely know if Maine still exists. I’m not sure why I remember the purchase location (the mind is a weird thing).
Over the years they dried out but thankfully they weren’t too dried out. The wood frame hadn’t cracked or split. (Once the wood is shot, traditional snowshoes are done. They become decorative wall hangers.) The dry rawhide and wood was easily remedied, as I’ll discuss later. Bindings was the harder and more immediate task.
My snowshoes (and most traditional snowshoes) have bindings made of some sort of artificial leather-ish substance. This material didn’t hold up as well as “natural” stuff like wood and rawhide. It got dried out and brittle and just generally “yucky”. Here’s what the top part of the binding looked like after removal from the snowshoe.
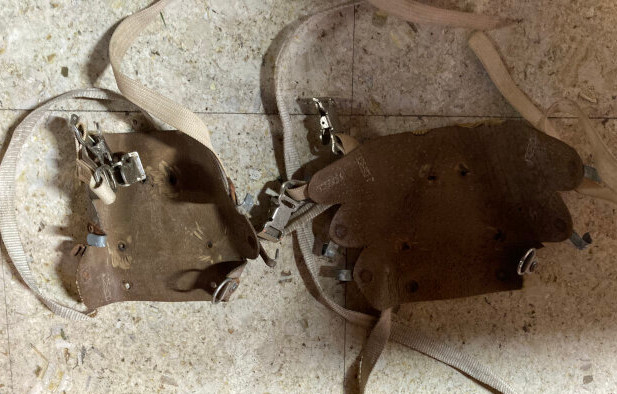
Shot bindings are not fatal, they can be replaced! The binding on a traditional snowshoe and the rest of the snowshoe are almost different beings. They need to work together at a pivot point but beyond that they can have different materials and varying design… most importantly, you can replace bindings without too much drama. (In my case, the hardest part was finding a guy selling snowshoe bindings.)
The pivot point on my shoes is unusual. At the time I thought it was a cool design. (I still think it’s a cool design.) I guess it wasn’t popular. I’ve never personally seen another snowshoe like mine (I didn’t search Google looking for their long lost twin or anything).
All snowshoe bindings must have some pivot or flex. Mine have a “spinning on a metal axis” approach. Most traditional bindings pivot on a knot tied in some sort of strapping. (This makes sense for a technology invented by peoples who had lots of leather and cordage but limited metal.) The strapping flexes, which is definitely the whole point of certain kinds of cordage, so it does work. But it seems odd to me in our modern world. I don’t try to make car axles out of neoprene, why would I use that material as the flex point on a snowshoe? (Then again what do I know? I think belt drive on Harleys is weird and they work just as well as shaft drive; which is what I think of as “normal”.)
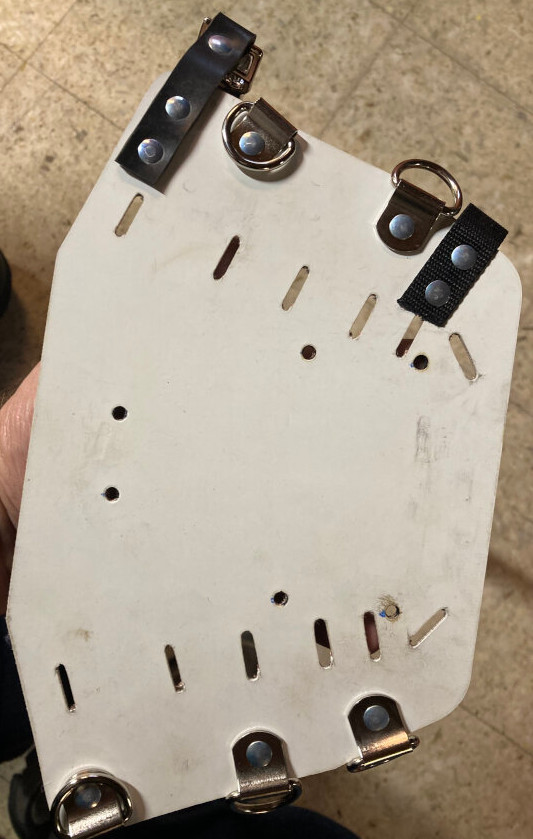
My bindings (which I’ve already admitted are unusual) had aluminum cleats underneath; facing down into whatever I’ll be stomping on. This is a photo from after it was removed and cleaned up and lightly sanded.
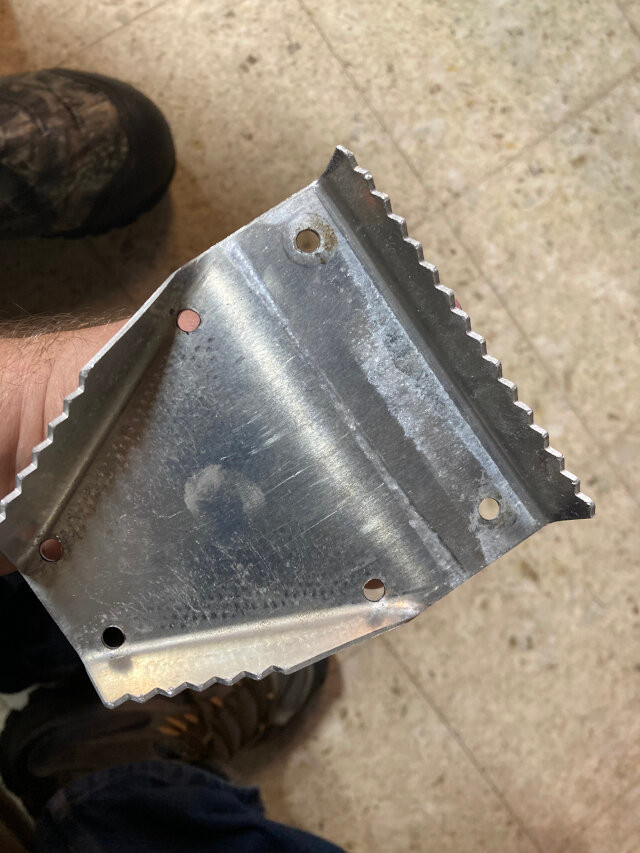
Bolted to the cleat was a little “axle holder”. It had a small plastic(?) bushing that goes between the pivoting cleat and the metal rod that’s solidly affixed to each snowshoe.
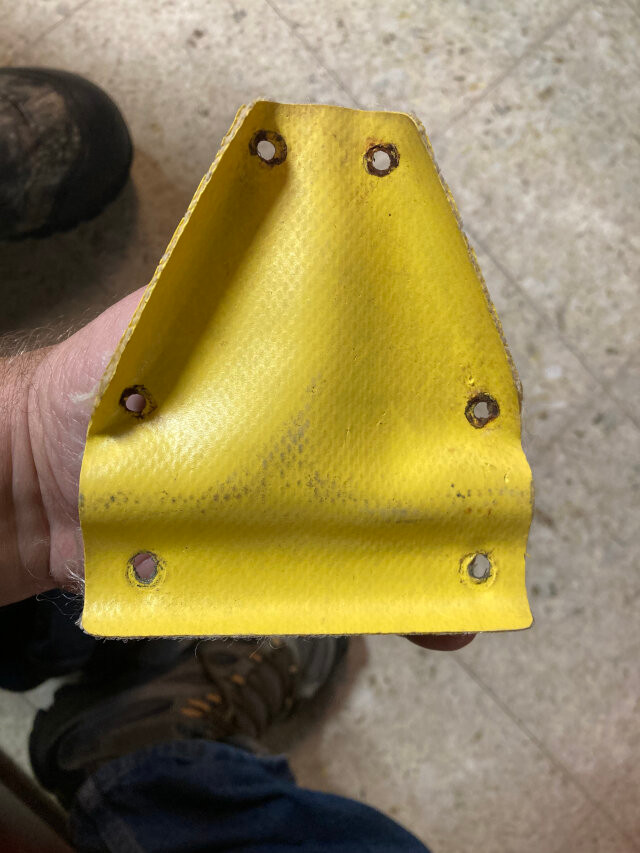
This was all covered (on the underneath side) by a yellow patch of neoprene (?). I think that was to keep ice from building up on the “axle”. It definitely “cleaned up” the look.
I’m astounded how well all those parts survived decades of age and use. The axle assembly thingamabob was held on by two stainless steel screws with two locknuts. After all those years I expected a struggle with corrosion. It popped apart like it was brand new! Nice! I reused the screws and lock nuts.
Aside from the two bolts holding the “axle thinbamabob” there were four rivets holding the grizzled old neoprene (?) bindings to the aluminum base. I cut the rivets off with a Dremel tool.
The replacement binding wasn’t intended for my odd snowshoe. It’s designed to be laced onto a generic snowshoe using the slots only. I got creative and drilled two screw holes in the front and four holes to match the holes in my cleats (the ones that formerly had rivets through them). I also bought big bad pop rivets. I wound up using about the biggest pop rivets I would want to do by hand.
I paid something like $75 for these bindings, which is a fair price for something so rare. (The guy selling them gave “build your own snowshoe” classes. He kindly gave me advice on my project and also sold me the bindings.) The pop rivet tool was about $15 and I’ll surely use it again in the future.
Here’s a photo of a binding taken after I’d attacked it with a leather punch.
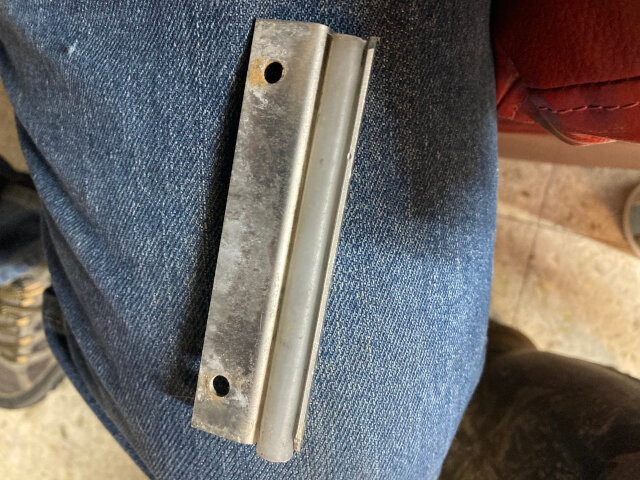
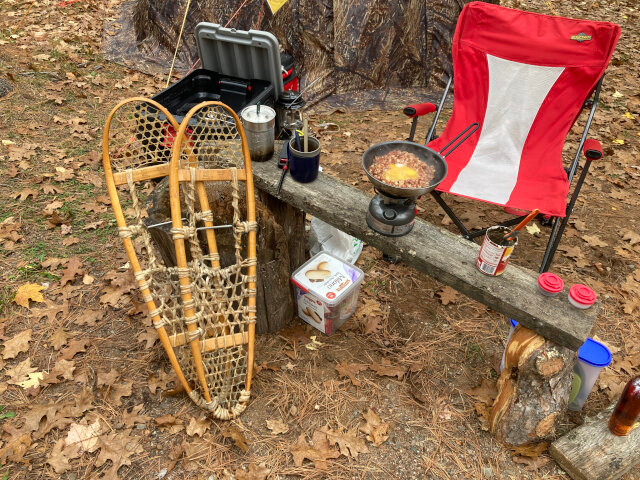
Skipping topics and going back to the snowshoes. This is what mine look like without the bindings. The metal rod is apparently uncommon. Also, that’s corned beef hash with eggs cooked over a Coleman burner running on unleaded. Breakfast of champions!
It was easier to fix the dried out rawhide and wood than I expected. The solution is to slather it with a lot of spar varnish. Use a lot! You could just slap it on with a paintbrush but you really want to lay it on heavy. It’s probably pretty wasteful of expensive varnish. Did I mention you can’t use too much varnish? Ideally you should do this more often than every three decades(!). I guess some people do it once a year. I might start doing that.
The snowshoe building class guy had a container filled with several gallons of spar varnish. That shit ain’t cheap and dumping 3 or 4 gallons into a container is a real investment! When people make their own snowshoes (in his class) they need to “dip” their new creations. For a fee, the snowshoe guy “dipped” my snowshoes too! To “dip” is a lot easier than using a paint brush and if you dip many snowshoes it’s far more efficient. Ideally you’d have many snowshoes ready to dip at a time to avoid wasting varnish.
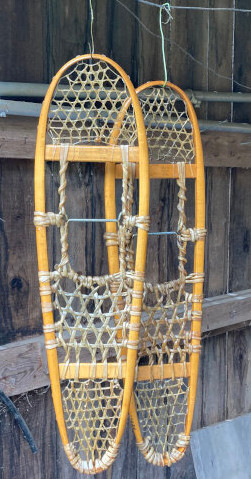
You can’t see it in the picture but my snowshoes turned from “old and worn” to “gleaming with potential”! It was a sticky gross mess for a while. Hanging them overnight in an old barn had them 95% dry but it would take a little longer to fully dry out. I like the smell of varnish. They looked great and I was delighted! (Note: Don’t “dip” binders in the varnish. Remove the binders before you get varnish on them!)
In my case, the metal rods (I got no idea what kind of metal) got a little bit sticky from the varnish. Assuming friction on sticky “axles” would be a bad thing, I sanded them smooth.
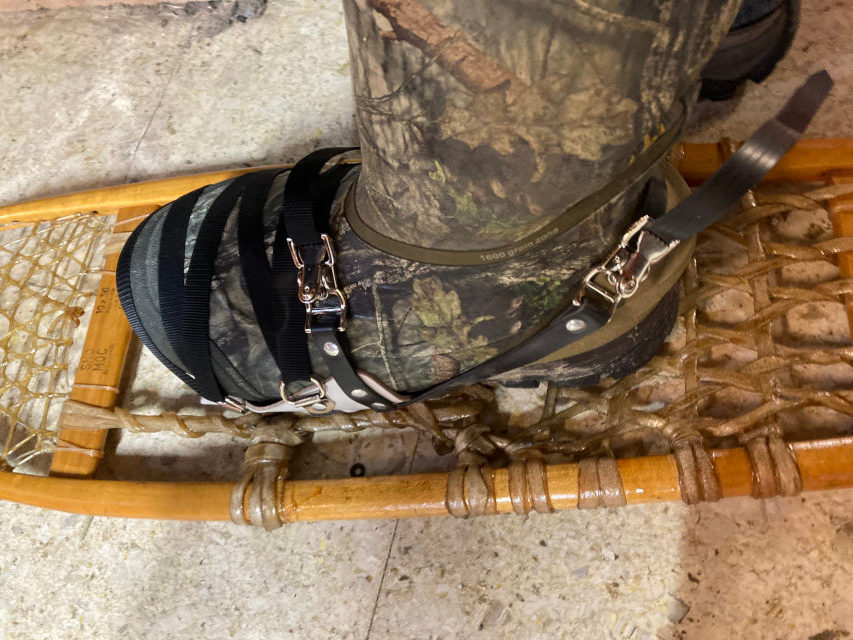
Here’s a test fit of the finished binding with a big honkin’ winter boot.
Conclusion:
I spent a little under $100 and made old snowshoes just as good as new. It hasn’t snowed enough for me to test them out but I’m confident they’ll do fine. I’ve never wanted mukluks more than when I look at the gleaming rebuilt snowshoes. (Boots work with snowshoes but I wonder if mukluks work better. I’ve never owned mukluks. God I love that word!)
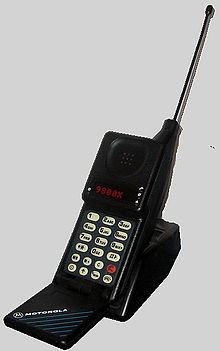
For comparison here’s a cell phone from roughly the same era as my snowshoes. Ha! Wood and rawhide has beaten plastic and circuits once more!
Happy winter y’all!
About mukluks versus regular boots: When I was young and on my first pair of traditional snowshoes, I was told that a boot with a heel would wear out the webbing under the heel, and to only wear a smooth-sole mukluk (or moccasin). Which I did, and never had any problems. We even (a couple of decades later) got our Scouts to build their own mukluks from untreated leather for a winter camp – worked pretty well, considering that they’d never done anything like cobbling a pair of ‘shoes’ before.
If you’ve never seen any wear from using a regular winter boot with a heel, then maybe I was misled all those years ago. Doesn’t really matter – if what you have works, then you’re golden.
I haven’t noticed wear at the heel. But mukluks just look warm and comfortable. My warmest boots are 1600gram lined rubber. I like them for working around the farm and stuff but they have giant treads that seem like unnecessary weight if you’ve got a snowshoe strapped on. I haven’t tested this.
Thanks for this series. When I was a young-un I did get to use snowshoes when we lived in Wyoming. I really have no use for snowshoes down here in Texas but this kind of read always sucks me in. If it snows down here, we usually wait until it’s gone around noon. Any worse weather and I personally just drag out the generator and dvd stream shitty sci-fi until it passes.