I’m Gen X. My youth was a more or less peaceful and sane time. At least it seemed like that. But I met plenty of what I called “Depression People”. I don’t mean that in a bad way or anything related to the serious mental illness of depression. I’m referring to people who’d come of age during The Great Depression; particularly those who’d been deeply impacted by it.
Even a clueless kid could see the scars. I had empathy and respect. What they endured, I cannot understand. I was carefully humble in their presence; even as I wallowed in the “spoiled rotten plastic plenty” of the 1970’s.
“Depression People” wasn’t all old people, just some. You could tell by how they acted. They hoarded the tiniest resource. I remember seeing a box labeled “small bits of string” that had, you guessed it, small bits of string. It wasn’t a person who needed the bits for some logical reason, say a fly tying hobbyist. This was a person who’d been through The Great Depression. It created a desire to preserve things they might need. I remember other things; jars of buttons, dull needles, bent nails. All available for a song in the 1970’s. All carefully stored in case the “plenty” of 1970’s disappeared.
Our current world is inconceivably wealthy; even for the poorest among us. Despite spastic baying on social media, we are the richest humans to ever exist. (I think the absence of want causes susceptible people to get funky. If you just ate a squirrel for breakfast because that’s all you’ve got, you’re based as hell. Oddly, that comes with a more contented disposition. A whiny barista clutching a thousand dollar phone, who squandered six years of college, and sports tattoos that cost more than my first car will twist themselves in knots over the fact that Bill Gates lives in a solid gold house. I do not habitually compare myself to either the rich or the poor. I’m merely me. Much of modern suffering is mere envy.)
Paul R. Ehrlich wrote the Population Bomb in 1968 and was more wrong about human starvation than any man in all of human existence. Starting right when he got famous for his dumbass book, for the first time in human history, starvation was almost eliminated. If there’s a famine in our modern world, it’s caused. In my lifetime, North Korea has had famines, as well as Haiti, Ethiopia, and (depending on your definition of such things) Cuba. (There may be others, I’m not a history professor lecturing about the details.) The point is that none of those tragedies were a crop failure. Terrible governance creates pockets of misery within a species that seems to have mastered the production of vast quantities of food. If you see a person in America that’s starving, it’s tragic and lamentable but it’s most likely serious illness (often mental issues such as anorexia or drug addiction). None of us waste away because peanut butter costs $50 a jar.
The Great Depression was the last time failure of the backyard garden might just cash an American’s chips. You’d need a heart of stone not to empathize. I wanted to give every geezer stashing bottle caps and cornflakes a big hug.
Of course, none of that affected me. Or did it?
The Great Depression hit in 1929, just shy of 100 years ago. My youth in the 1970’s is about as far away from now as The Great Depression was then. My youth had nothing like the wealth of now. It wasn’t all that bad but it was definitely not like now.
No regrets! I got to watch Star Wars in the theater (long before Disney piledrove a great story into the ground). In 1981 MTV was playing music on Cable TV. I didn’t get cable in 1981 but I would soon. Our house switched from black and white to color TV in time for me to discover the Hulk was green! It’s mostly good memories. If I suffered food-wise it was because my mom bought Tab soda, not because of a potato famine. (*Tab soda, anyone remember that? It was awful!)
Last year I was cleaning house. As a rural fellow, that means stacking shit in my truck, driving it to a landfill, and tossing it on the heap. Amid the trash cans and plastic bags was an old broom destined for disposal. Having emptied my truck, I grabbed it and swept my truck bed clean.
I am not Depression People. I swear I’m not. But the broom was handy so I kept it. It stayed in the truck ready for the next dump run.
It got increasingly battered but I kept using it. My son viewed the broom with suspicion.
“Why don’t you toss that thing?”
“It still does an ok job.”
He shrugged. I suspect his thinking was that I’m such a goddamn fossil that I experienced a real live black and white TV and reminisce about it. Thus, allowances must be made for my weird behavior.
The broom disappeared for a while. I’d used it to brush snow off some firewood. Then it reappeared under an old tarp. I tossed it in the truck again. By now it was frayed and the handle was slightly bent.
“You gonna’ toss that thing?”
“Nah, it still works.”
Several weeks ago, on another dump run, the handle finally got bent completely out of shape. We were chucking things at the dump. The broom had given its all. My kid was up in the truck bed kindly helping me toss something heavy. I forget what it was. He’s a grown man now and helps me because he’s kind and he knows I’ve been having health issues. I much appreciate his help.
He looked at the broom. The handle was nearly folded in half. He looked back at me.
“OK fine”, I admitted, “it’s shot.”
He cocked back his arm to send the broom to the dust heap.
“Wait!” I interrupted. “Can you spin off the handle? I could use a whisk broom in my shop.”
Sometimes you say something and realize you sound like a dumbass. I could almost hear his eyes rolling.
“Just chuck it.” I surrendered.
He hurled it in a flash, lest I come up with some other cockamamie reason to keep it. He looked satisfied and I had to admit he was, in this topic at least, the wiser of us two.
Am I like the Depression People?
A couple weeks later he told me “a broom was on the way”. It was a gift. Apparently he’d ordered delivery from Walmart. This based on DoorDash or some other technology that is not now and never will be at my rural location. It makes sense to buy a bunch of shit all at once if you’re paying delivery. Part of that was a cheap broom.
The thought of delivery from WalMart seems amazingly luxurious. But I don’t mock it. I once lived where I could get Chinese Food delivered. It never got old. One must enjoy things when they can!
Here’s where things get modern. For some reason, known only to computer algorithms, the broom was slated “for delivery” but it was delayed, coming from some other location. There was no additional fee for this.
We discussed the broom. Where was it coming from? Who knows? How was it going to get delivered? No idea? All we knew was the computer said it was “on the way”.
It arrived a few weeks later; in the mail. It came in it’s own box. It was packaged in three pieces. My son assembled it and handed it to me. I can’t remember how much he paid but it was a pittance. I think it was $6?
$6… for a whole damn broom. A broom delivered from God knows where it was manufactured to a mailbox a million miles away. There can’t possibly be much profit in that?
It’s lying in my truck bed right now. It’s not an heirloom, just a cheap broom that through some inconceivable reason was sent via mail. I’ll use the hell out of it and in due time I’ll chuck its battered hulk; probably in the same landfill where the other one went.
All for $6. The mind boggles.
There’s no way a $6 delivered broom is a sustainable model. We all sense such things. On the other hand, nobody knows what will come next and it doesn’t necessarily have to suck. People have been predicting collapse as long as I’ve been alive and it keeps not quite happening. I’ve predicted 7 of the last 4 economic downturns so my track record ain’t great.
It’s nutty that a broom would come in the mail for $6 but nobody knows what comes next. Will it be $150 handmade, organic, hippie approved, locally made brooms? Will they be heirloom quality? Such a broom would require that you care for and maintain it for a lifetime and maybe pass it on to the next generation. Or will it go the other way? Will SpaceX drop one from space for $3? Will it be the bare minimum number of molecules, fall apart in a week, and come in six packs? Disposa-brooms?
I’ve no idea.
Does some portion of each successive generation become “Depression People”?
I do not have a box labeled “bits of string”. I do have a bunch of campfire wood culled from old pallets. I’m damn near there aren’t I?
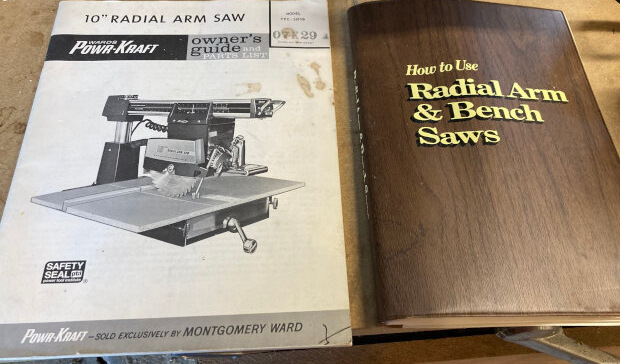
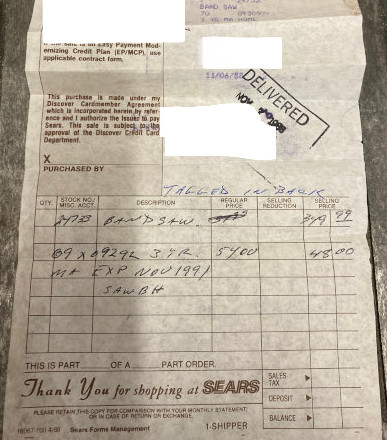
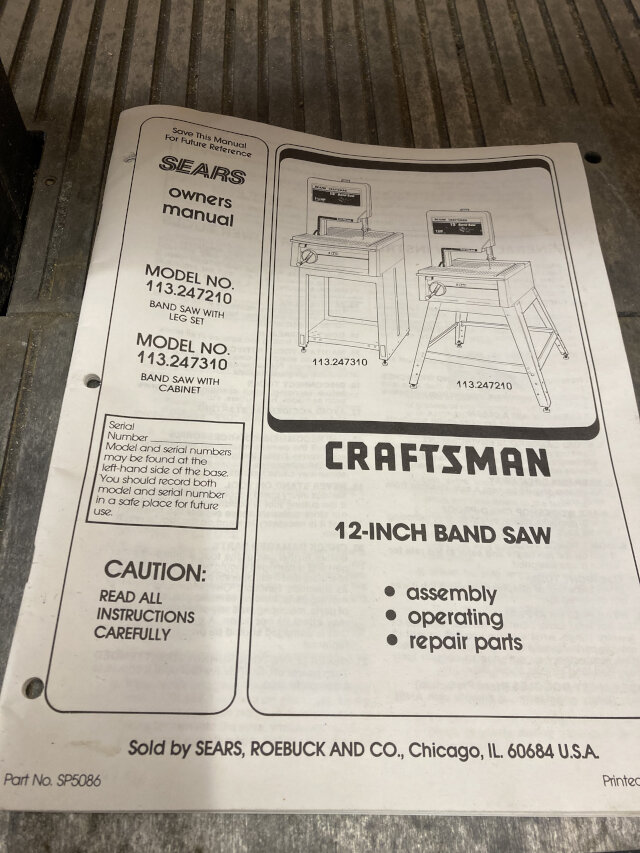 Check it out. I found the receipt. What a piece of history! This is what things were like the very last moments before computers took over everything (you can see some dot matrix print at the top so computers were already “a thing”). Hand written items and prices and stock numbers. A stamp that says “delivered”.