I was fiddling around with sawhorses and made a 3d printed jig. I offered to sell copies. I wasn’t sure anyone would care. Apparently I was wrong!
A handful of people were interested. How awesome is that?
I didn’t plan ahead for that. Give me a little bit of time to sort through details. I need to go to the post office and figure out how much it costs to ship a jig (or many in the same box).
Then I’ll order some filament and post a price here on my blog. The good news is I’m way ahead of the curve. I plan to print and ship with plenty of time before Christmas. Hint hint… they’re the perfect stocking stuffer for the kind of guy who knows what a miter saw is and uses sawhorses.
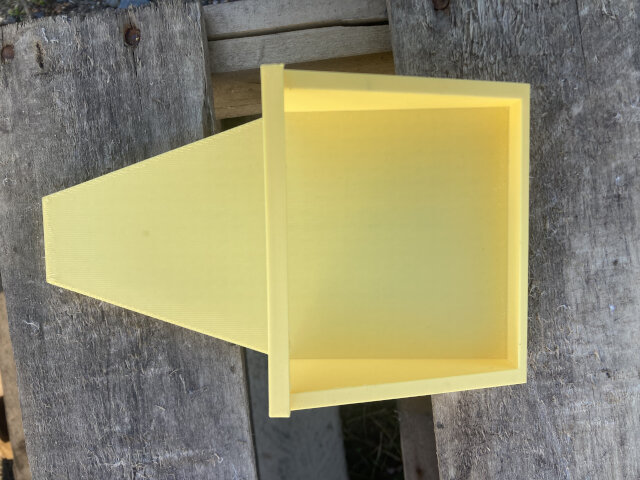
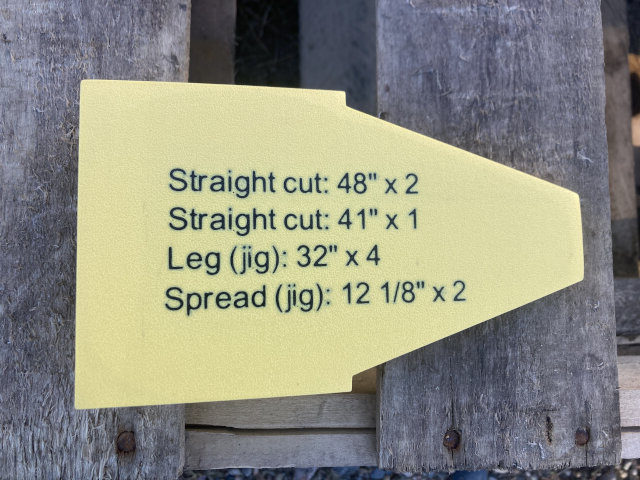
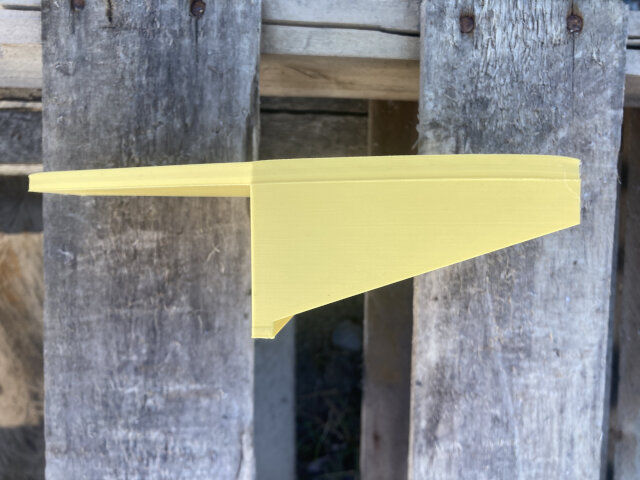
In case you don’t know what I’m talking about, photos of the jig are copied below (or just scroll backwards on my blog).
Here’s the jig (it’ll be a little nicer because I’ll use more infill, the photos are of a haphazard “prototype” I made for my own use). I picked the colors at random but I like how they came out. For now, I’ll plan on yellow PLA with black PLA.
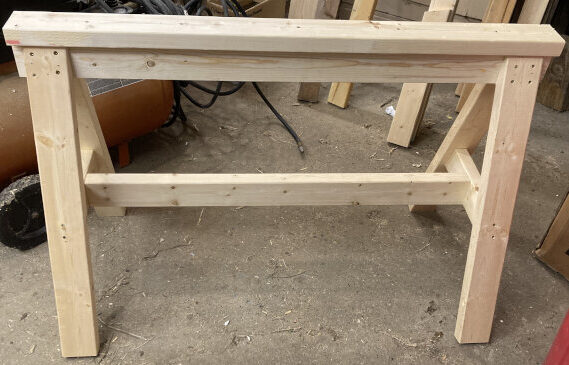
Here’s the sawhorse you make with the jig. All you need is three studs and some screws. It’s a bargain compared to buying a sawhorse.
One more note, you don’t need the jig if you don’t want it. (Though it does make things much easier.) You can make the same sawhorse by following along with this video. That’s what I did at first.
Also, the video is a pleasant watch and I recommend it. The guys in it seem pretty chill. I hope it doesn’t freak ’em out that some rando (me) is making a jig. I intend to send them a free jig if there’s an address available. I haven’t done anything yet but I will. I don’t want to make a bad impression.
A.C.
P.S. If anybody wants a different color jig, that’s do-able. I think translucent blue PETG looks cool. Or you might want pink to annoy someone with a flaky color. (The pumpkin spice of colors.) Funky colors will cost a little more but I can do it. If that’s something you’d like shoot me a request in comments (or privately at ac@adaptivecurmudgeon.com).
P.S.2. I was leading up to my next level 3d printed design in “text free communication” about the sawhorse. I had a print failure so I can’t post that just yet. Still, it’ll be cool when it’s done. I’ll post as soon as it’s ready.
P.S.3. Once I get a price, I can take payment via credit card on PayPal. If you want to order, please tell me you’re interested but wait on the payment until I set a price. OK fine, if you’re nuts and want to pay like $100, just pay now. That’s crazy but I’m not going to stop anyone from burying me in cash! 🙂
P.S.4. I’ll check U.S.P.S. box dimensions but I think I can put several jigs in the same box. Buying more than one will probably cost nothing extra for shipping!
P.S.5. If you’re in a rush, I might possibly get a few jigs out by Thanksgiving. But that’s a stretch. Filament takes a week or more to deliver. I can only print “rush jobs” with “filament I’ve got on hand”. I might run out of yellow.
I built that saw horse decades ago and it is still in use. If you would, move the center stretcher close to the leg and add another to the other side. Having two stretchers allows you to attach a piece of 1 X or plywood to sit your saw. I found this to be a big plus.
Deacon in Louisiana
Good idea.
A consideration with sawhorses is how much room it takes to store them. If they can stack or nest in some manner it is a great space savings in a small shop.
Unfortunately they don’t stack very efficiently. I think it’s a trade off from using absolute minimum wood for construction.
I built a pair 40 years ago with the legs angled in two planes- splayed like the ones you built, and also fore and aft. Does two things- adds inherent resistance to racking as they are not parallel,, and also allows them to stack-nest- the ones I built have no stringer between the legs, just a plywood gusset between them.
Much harder to figure out the compound leg to top stretcher angle though.
File for a patent. IMMEDIATELY!!! Otherwise some unscrupulous legal fool gonna steal your intellectual property and send you a cease and desist letter. Then we’re all screwed. After you get your patent start selling them to the local hardware store. It won’t be long until some big outfit offers you big money for the patent.
Not a bad idea but I’ve no idea how to file for a patent.
At the very least print a couple of hard copies of what you have, put them in envelopes and have the post office stamp the flap with their hand cancellation stamp. Mail one to a very trustworthy friend with a paper trail. Certified with return receipt. This proves the date of invention. I’ve heard it referred to as a poor man’s patent. Then go see a patent lawyer with a third copy of what you have.
While you do that, start selling them locally. Cheap packaging with a single sheet of instructions. Maybe a vacuum pack? Print a cute label on card stock. Card stock will be stiff enough to hold up to the vacuum sealer. Think of this as a cheap imitation of blister packaging. A dozen to each of the local hardware stores on consignment. With a couple of the magnetic micro models for a display.
Check back at least once a week to restock and see if the store owner has input.
The goal is to pique interest and entice demand. Then you’ll be in the enviable position of choosing between running a profitable 3D plastic manufacturing company or selling the intellectual property for an astronomical sum and using it to underwrite your camping exploits.
Think how much fun it would be to cash a royalty check on a regular basis…
That’s all good ideas. I might get caught up in a Christmas rush (which is a good thing!) but sending some certified envelopes is logical and I can do it with my “spare/undesirable colors” filament.
Also, I’ve been looking for an excuse to buy a vacuum sealer for ages.