[Warning: Math follows. And some geometry. And lots of finicky details. I’m nerding out. If that’s going to freak you out, skip today’s ruminations. I won’t judge.]
Nerd video below:

If you get bored, don’t blame me. I think this shit is fascinating!


You’ve been warned…
I’m trying to 3d print a thing. It has become a huge (but interesting) challenge. I want it to scale, it includes parts that are shaped in ways that vex a 3d printer, and I’m trying to make it specifically not look like plastic.
All of that is not as weird as you think. The shape thing happens all the time. Unless you’re Microsoft, the machine is less important than the job it must do so you hammer the machine and finesse the orientation. As for not looking like plastic, people do all sorts of colors and materials and textures. Plus, all 3d printer guys are at war with the ultimate evil… layer lines. So I’m messing with that too.
All this is beyond my pay grade… or it should be. So far I’ve happily focused on making things mechanically strong (which is a rabbit hole itself). Once I’ve got that handled I’ll dabble in making things “pretty”. Or not. I sometimes pick a nice color or make things match, but often I just use whatever color I’ve got hanging around in the material I’m printing. I’m a guy. Colors are… meh.
I’m trying to “level up” so reluctantly but eagerly (if that’s a thing), I’ve branched out into printing wood. I know what you’re thinking. “Wood does not turn liquid. It won’t flow through a nozzle. Weirdo!” But nerds are smart and they’ve been doing this for years. There really are filaments that are “wood impregnated”. (Note: my experiments with wood impregnated should teach me shit I need for carbon fiber impregnated later this summer.)
My spool of “wood” from Bambulab is around 15% wood sawdust (actually very fine powder). This is combined with normal plastic (PLA). It is said that the resulting object can be sanded, stained, and otherwise treated as wood. Results on the internet look impressive. Then again any photo of a person you find on the internet is also filtered to be inexplicably hot so maybe I’m just seeing good lighting or something?
It looks just like PLA. It supposedly prints like PLA. Except it doesn’t. Why? Because it ain’t PLA. I didn’t know the details at first and had some “bed adhesion” failures. The print curled up off the print plate and started shifting all over. My precisely drafted components became globs of filament spaghetti. (You can get the same feeling of “this ain’t the same thing” by running E85 in a car that’s not designed for it.) Except nothing was damaged on my 3d printer. I just had to clean up, tweak settings, and try again. (Try that with your E85 experiment.)
That’s just part of the puzzle. I want to make an array of interacting cylinder shaped objects… to scale. Meaning there’s all sorts of math I’m not sharing yet that forces me to do stuff the slicer software doesn’t like.
I suspect a cylinder printed horizontally is a pretty decent challenge of your 3d skills. Anything you print must have bed adhesion (remember a couple paragraphs before this?). The best path to bed adhesion is lots of surface area on the bed. (There are other details like having a bed so clean you could use it for surgery. Also, the bed is heated so that’s a thing. Plus you can have different bed plates with different properties. The rabbit hole goes deep.)
The contact area of the tangent of a circle perpendicular to a plane is zero… in theory. Also repeat that sentence… it’s English I swear. It’s a true thing. Don’t blame me that the universe is complicated.
The contact area of the tangent of a circle perpendicular to a plane is zero… It’s not my fault!


So I’m trying to print something that’s theoretically impossible? Nah. Nothing is impossible! The software knows what to do. It smacks me upside the head and says that I’m printing layers which have a minimum dimension that’s NOT zero. I think .2 mm layers? So the contact patch is .2 mm… which is what it feels like when I bank my motorcycle hard on slick pavement in rain. Then there are things called “brims” which aren’t the object but surround it… presumably to bully it into staying put. When the print is done you peel the brim off.
Confused yet?
Any cylinder will have an overhang. Like an overhanging cliff. I think the software calls it a “cantilever”. (“Cantilever” is also a small brand of bourbon made in an obscure town on the Minnesota/Ontario line. I don’t know what the experts say but I rate Cantilever bourbon as good shit. I’m just sayin’.)
Printers can handle some overhang but not too much. So I can mess with the scale of the cylinder to reduce the cantilever? Maybe. Or I could just tell the slicer to quit yelling at me and print the damn thing already. Or I could add supports… except supports are a PITA I’d like to avoid.
I’m even confusing myself! Here are some pictures to help.
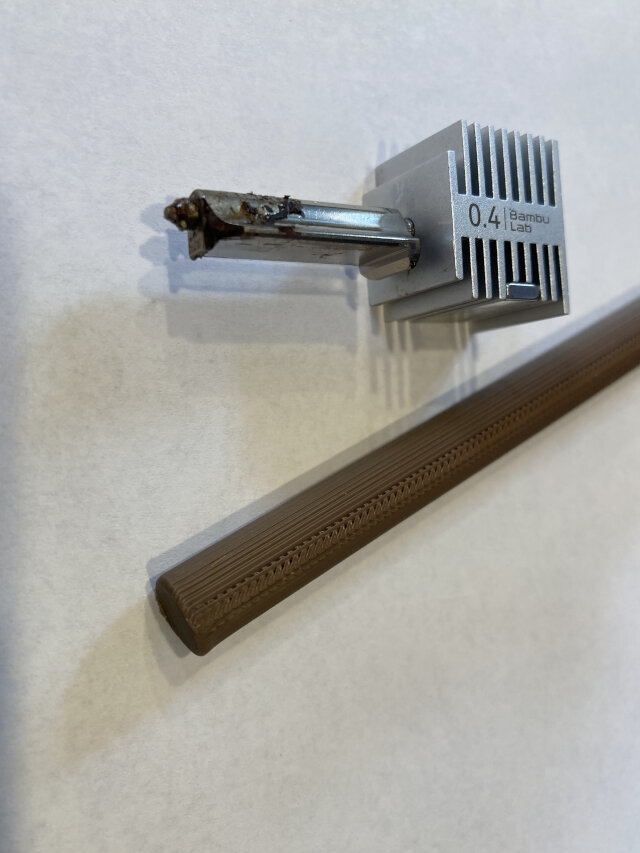
Here’s a standard 0.4 mm print head and a PLA cylinder. See how it looks weird on the top? I can live with that. I can tweak the top. I’m interested in the sides. This is about the diameter of a pencil. (The print head is dirty… dunno’ why. It’s got well over a thousand hours on it. I don’t think it matters?)

The image below is me experimenting with different diameters. Notice the “brim” at the base. I’m getting OK bed adhesion. The color is irrelevant, this is all PLA. I decided that larger diameter looks better at the top, but I don’t care about the top. I will be tweaking the shape in other ways at the upper layer. So, big diameter isn’t that important… at least that’s what I tell the ladies.
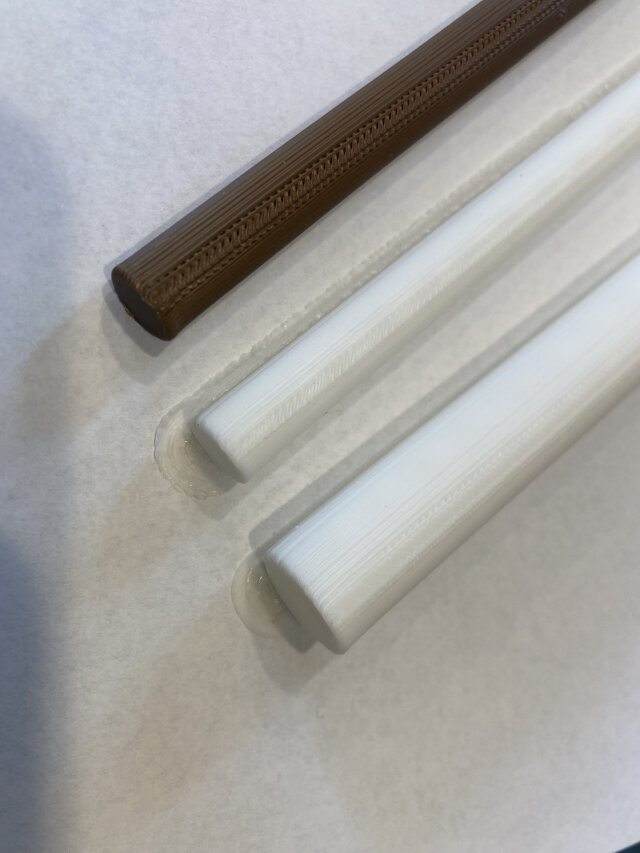
I wanted the sides of the object to look more like a thing that might occur in nature. The lowest object in the image below has a setting called “fuzzy skin”. The setting introduces a bit of random jitter to the print head as it loops around the outside perimeter of the object. I think it is an improvement… but maybe I’ve been staring at plastic too long? Also, the top two rods are straight PLA but the third rod is Wood PLA. So many interacting variables!
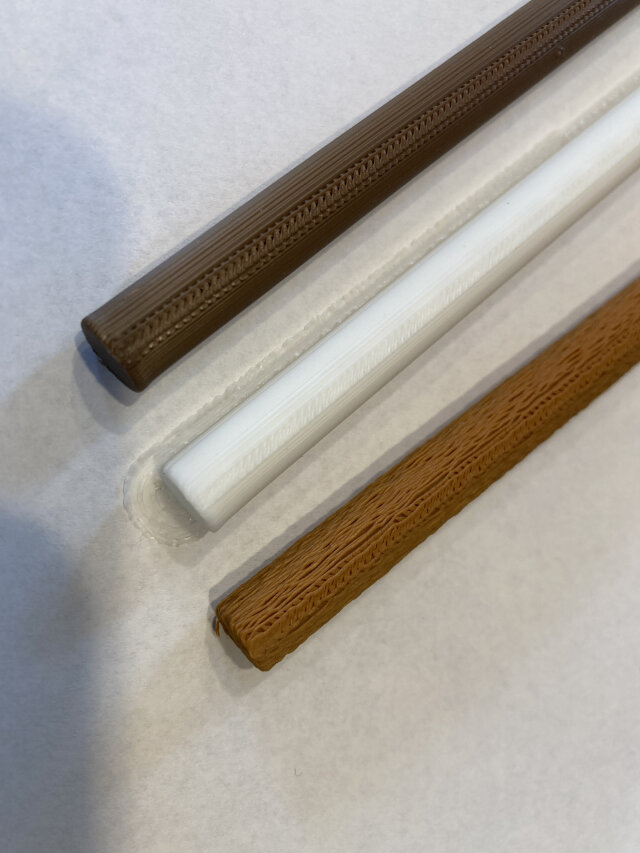
Time for empirical evidence. I compared “fuzzy skin” to default PLA with a wooden stir stick in the middle. (Do you notice that the top half of the stir stick has coffee on it? That’s some real world testing y’all!) I really do think the goofily named “fuzzy skin” matters.
I have more pictures (especially of the wood) but I think I gave my iPhone a stroke. The photos live in the iPhone but aren’t uploading to iCloud photos… which is the least interesting thing that could happen. I will fix that too, but not today. Besides… this is the internet, it’s all about text. Who cares about photos? Right?
Also, enshittification wins this round. I did all that 3d modeling and slicer settings and 3d printer tweaks… only to be defeated by a fucking iPhone? I’ve been geezered!


Anyway I have so far figured out the following (especially about “wood” PLA):
- Dry it.
- For fuzzy skin on a horizontal cylinder, that’s about the size of a pencil, and made of wood PLA… slow shit down.
- Outer wall 60 mm/s.
- For bed adhesion with wood PLA I also slowed shit down:
- Initial Layer 300 mm/s.
- Just give up and accept a brim. It’s not that bad.
- Keep your bed so clean Adrian Monk would eat off it.
- Switch to a 0.06 nozzle. That’s a huge improvement!
- Everything I listed in 2 and 3 was determined on a 0.04 nozzle.
- This may mean everything I figured out is either moot or changed and needs to be re-figured out. I did this to myself. I wanted a complex hobby.
So that’s that… until I figure out more stuff.
AC
P.S. No matter what, always wipe the bed with alcohol and a microfiber rag after every print. That’s never a bad idea. Monk would approve.

