You’re wondering when the Cyberbrick gadgetry ties in with 3d printing? That starts now! After I was done sorting and stashing “stuff” from the Cyberbrick kit (a dual kit!), I wandered over to MakerWorld and picked the project I’d build.
I started simple. I would make a remote controlled toy forklift and the remote itself. This is one of the basic, pushed by Bambulab, models. I figured it was plenty complex enough for yours truly.
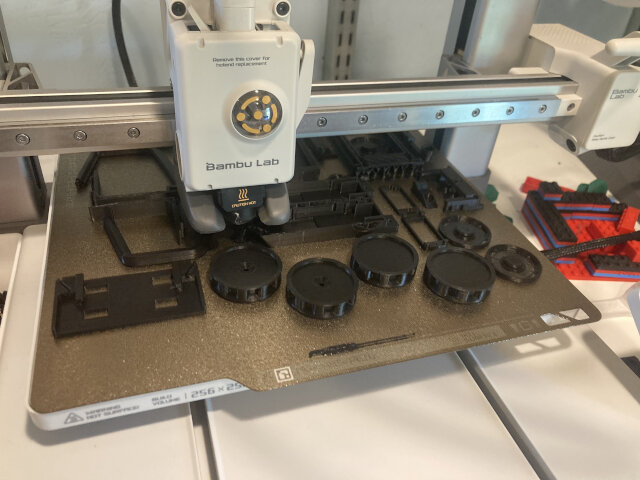
It was super simple to download the “project” for the forklift. The “project” has several “plates”. I fired the first “plate” through Bambu Studio “slicer” and the printer without any effort at all.
I did nothing but pick out the filament color. In this case PLA Black. (PLA is the simplest and easiest and cheapest of plastics but it’s still plenty good for what is basically a toy.) BTW: There’s no reason why you need print only one part at a time. You can see that about a dozen parts all came out on a single plate.

Voila!
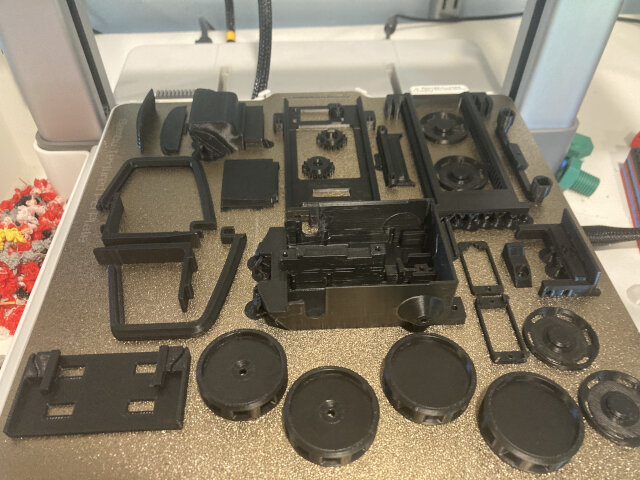
I did almost no “post processing”. I just popped the parts off the plate and tossed them in a box (lest a few parts vanish).
Then shit got real! PLA is so simple a monkey can do it. I’ve also “leveled up” to PETG, a plastic with superior traits that’s only mildly more finicky. But the design I wanted had “tank treads”. That requires flexible prints.
The most common filament that can flex is called TPU. All filaments are affected by relative humidity but some more than others. PLA can be managed with desiccant and luck. PETG needs a little more attention but not much. TPU requires drying. (At least that’s what they recommend.)
Lucky me, I bought a filament dryer months ago. I hadn’t used it much but it was there taking up desk space. Turns out it’s simple and easy to use. I took a deep breath, opened a fresh spool of TPU, and ran it through the dryer. My dryer is a Creality Space PI Filament Dehydrator for two spools. The dryer’s name is stupid but Creality is an established 3D printer company.


There are many dryers and I suspect they all work about the same. I like what I got but you can get by much cheaper (for example, my dryer can handle two spools at once but you can squeeze the price down by choosing a single spool model). Many innovators try experiments with toaster ovens and whatnot. But I’m hooked on 3d printing and was happy to just have the “wet filament” issue “solved”. I dropped just over $80. As always YMMV.
Oh you think I’m done? Nope! The thing about making actual existing things in the real world is that the real world has hidden complexity. I had to learn new techniques to print TPU. First of all I have a Bambulab A1 Combo. The “combo” part of the equation is a device that allows me to run up to 4 filaments at a time through a handler called AMS Lite.
TPU is “squishy”. The AMS Lite can’t push a noodle. Don’t fret, there’s no single printer that’s perfect for all uses and there’s always (usually) a solution.
It’s stupidly easy to “bypass” the AMS Lite and feed the flexy TPU directly into the printer. (I’ll admit I watched a few YouTube videos to figure out the process. It takes like 30 seconds once you grok the situation.)
Here’s a photo of me running TPU from a cereal box.
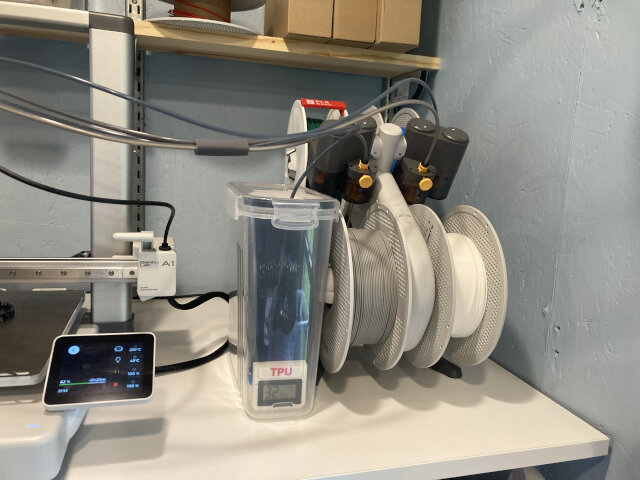
Watch out when I say “cereal box”! This is not just any cereal box! It’s a super awesome spool holding box!
<At this point I went off on a tangent about my “fleet” of spool holding boxes and why they’re the greatest thing since sliced bread. I cut that out of this post and put it in the next. Forgive me in advance, I love my cereal box conversions.>
So now that I’m feeding dried filament straight from my special dry box straight to the printer (bypassing the AMS Lite), I’m ready for TPU right? Wrong!
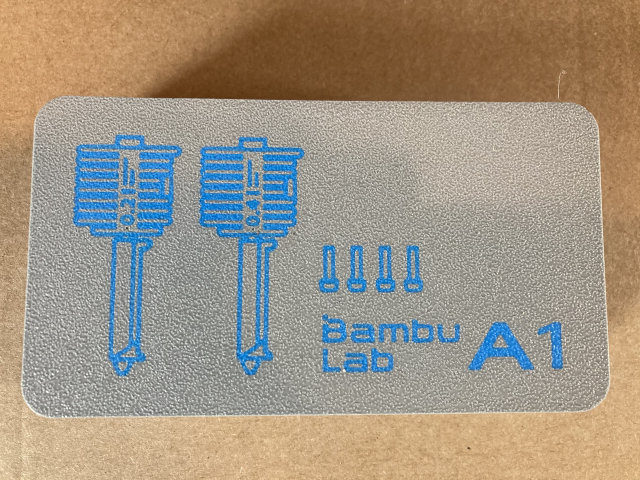
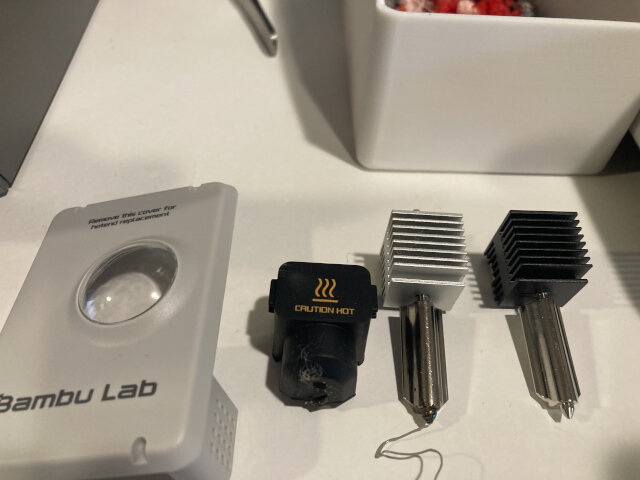
For reasons I’m not entirely sure about, the nozzle that comes with the Bambulab A1 Combo is not good for TPU. I had to buy a different variant of what’s called a “hot end”. <Insert joke here.> Happily “hot ends” are cheap! <Insert raunchier joke here.>
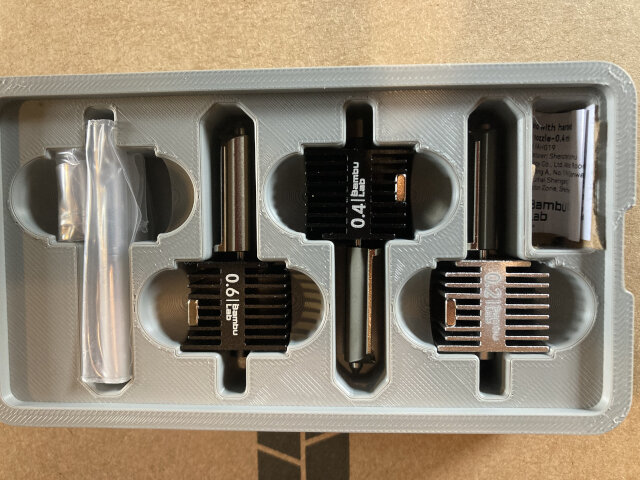
Hot ends come in different diameters. The OEM hot end is 0.04. A couple months ago I’d bought hot ends in 0.02 (for fine slow work) and 0.06 (for thicker faster work).
Hot ends also come in “regular” and “hardened”. <Good grief, the jokes write themselves!> Apparently TPU is coarse or something and needs “hardened”. A few months ago, in anticipation of the TPU learning curve, I bought a 0.04 Hardened hot end. (They’re cheap… something like $7 I think.)
When in doubt, I always make a cool toolbox. I printed up a “hot end” holder so I wouldn’t lose anything. (I didn’t make this design, I just downloaded it.)
Since I had the parts there was no excuse not to swap the “hot end”. This is what the print head looks like with the cover on.
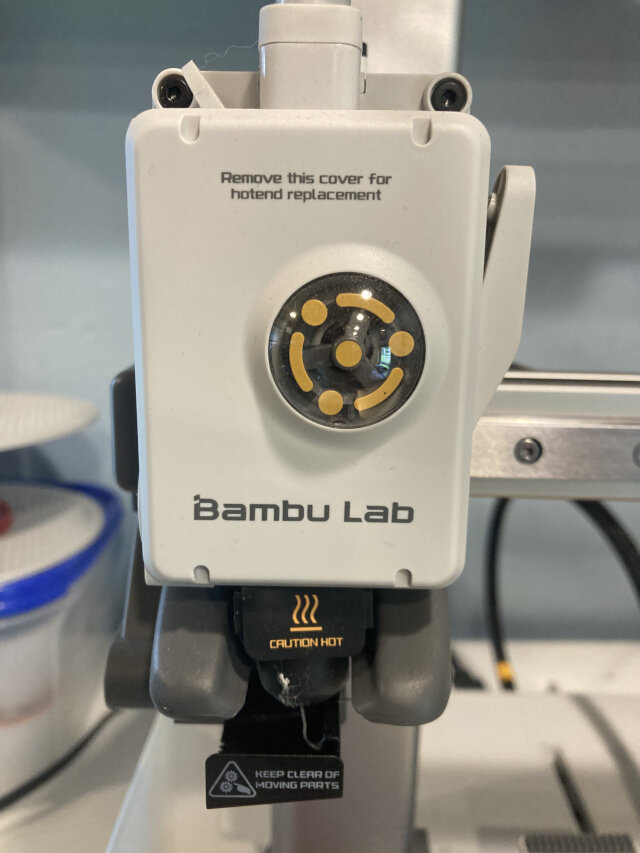

You can pop off the cover without tools.
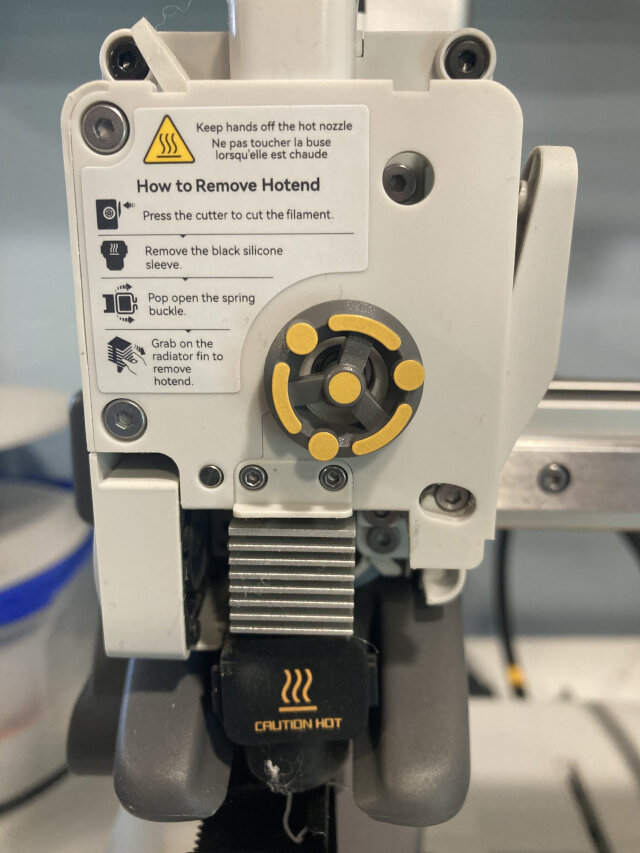
You can swap the hot end without tools too. I was freaked out that I’d damage something but it’s actually no big deal.
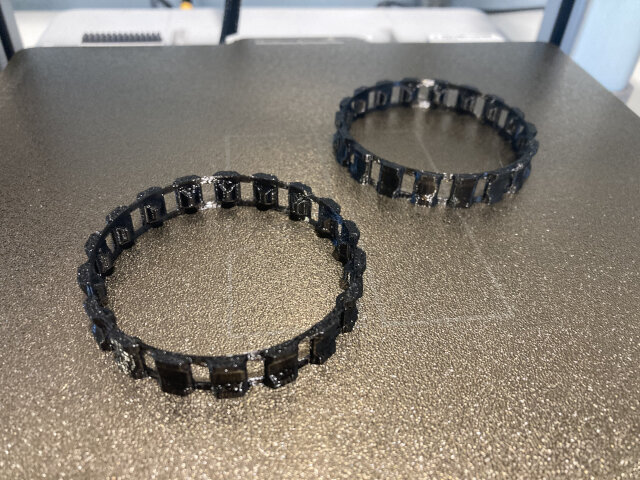
So did the TPU work?
YES!
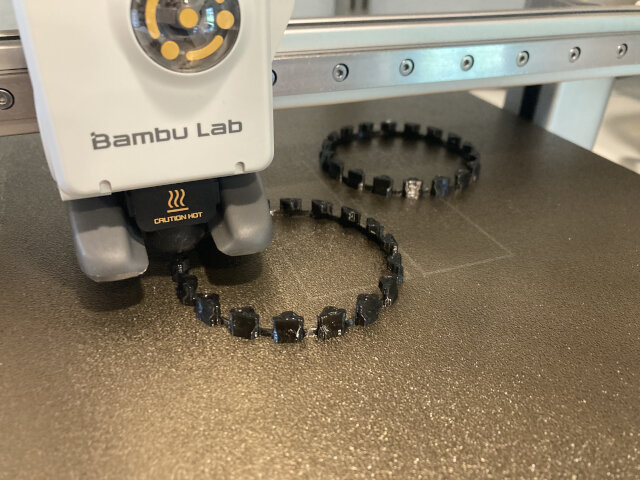
Flexible tracks! It’s amazing what a 3d printer can do.
There’s more cool stuff I’ve printed for the project but I’ve written too long about the TPU*. I’ll post more later.
A.C.
*When I bought the printer I was already looking forward to TPU. TPU can be printed as gaskets, Crocs, fishing lures, sheaths, etc… I’m super glad I’ve approached that part of the learning curve.