[When you get a 3d printer, people have two reactions. “That’s cool… nerd” and “there’s no point to that useless gizmo”. The latter can get brutally negative. I’m not sure why, but 3d printers freak out the squares.
The answer seems obvious to me. What will I make? Anything!
An “anything maker” has greater variety than almost any other tool you’ll find. A socket set is a one trick pony by comparison. But you have to get past the “only a factory can make things” mindset. Everyone and their dog has a house full of cheap plastic shit from Wal-Mart. People bought that stuff so clearly they must have wanted it at some point. Yet people act like plastic is the work of Satan. Apparently, the only socially acceptable DIY outlet is to lovingly carve heirloom rocking chairs out of salvaged oak?
Also, I’ll admit there’s a learning curve to 3d printers. The gadget isn’t magic. You’ll crank out keychains and toys for a bit while you learn.
I ponder the resistance. Folks fill freezers in a world with grocery stores. They stack ammo like dragons even though the sporting goods store is nearby. It’s odd that “anything in plastic” is particularly alien.
“Anything you’d find at Wal-Mart” at a cost of around $10 a pound is a pretty good deal. Yeah, I’m oversimplifying: printing a Lego is easy, printing a TV is hard, and printing a grapefruit ain’t gonna’ happen. Even so, I see the potential.]
This among my first “fixed a real problem with 3D” challenges. In 2011 I installed a telescoping aluminum flagpole. Over time, some parts broke. I used 3D printing to fix it.
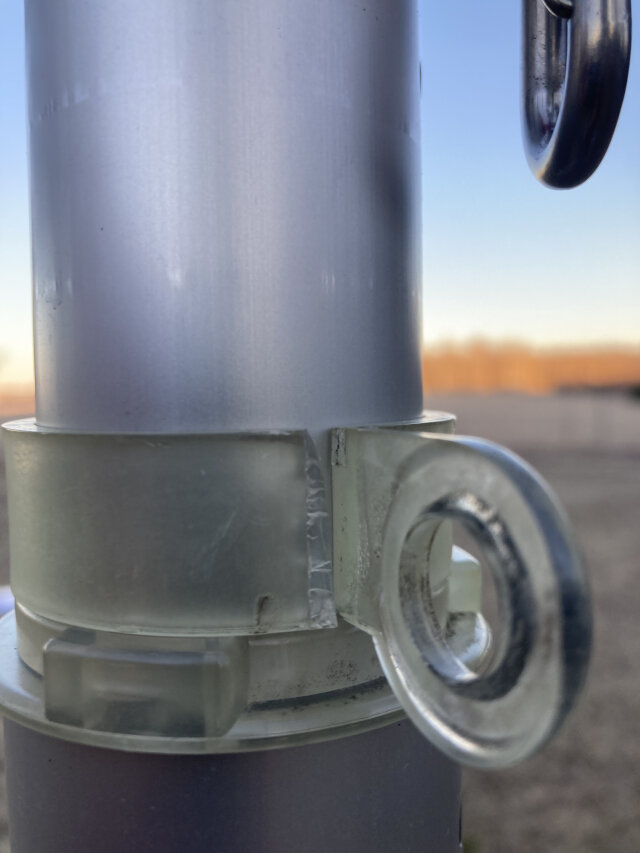
Plastic parts encircle the aluminum tubes. They’re little “gizmos” to which I clip the flag (including a second lower flag if I want). I didn’t know what these were called. Google suggests they’re top, double (in the middle), and bottom “swivels”. Because the flagpole is retractable, I don’t have a rope and pulley. I just reduce the flagpole’s height until the “swivel” is within reach.
It’s a rough environment. I’m not upset that the plastic swivels are shot. They lasted about 10 years and that’s not too bad. I ignored them until a windstorm got out of hand in February. I retracted the pole, consigned the torn flag for proper disposal and was like “where the heck will I find plastic parts for a 14 year old flagpole?”
I didn’t really even look for the parts. I knew they’d be unavailable locally and I didn’t feel like hurling any more money at Amazon.
Instead, I “designed” a solution completely from scratch. I “drew” it in Fusion360 (free) software. This is an entirely new thing. I didn’t download some dude’s plans, or Google “how to make flagpole do-hickeys”, or take instruction from anywhere. Nor did I carefully copy the broken parts. I took a few measurements and created a 3d dimensional object that was bulkier and chunkier to my personal specifications. How can that not be cool?
Then I fed the design into my 3d printer’s “slicer”. Without going into the weeds, the slicer has settings your 3d printer uses to turn the pristine mathematical construct you created in cyberspace to a physical object in the dirty, stochastic, gravitationally pulled, climate uncontrolled, real world.
There’s about a million things you can do in a slicer. They matter (or not) based on the specific “never before in existence” thing you’re making. There’s a lot of room for experience. Luckily, a Bambu Lab A1 is pretty forgiving and I wasn’t exactly making a complex object. I tuned a bunch of nerdy stuff to make it extra strong and hoped for the best.
It seemed to work.
3D filament comes in all sorts of “material”. Plastics of every sort and chemical structure have different features. The easiest to use, (in my opinion) is PLA. A small step up (also in my opinion) is PETG. PETG has much greater resilience. (It costs about the same.)
I’m going to seriously stress the material. My flagpole gadgets will be UV exposed in the sun, rained on, cooked dry, froze to well under -40, blown in blizzards, shit on by birds, etc… Here’s the cool part, I don’t need to freak out. If the part fails it’s just a thing to replace, not the nose cone of an F-14.
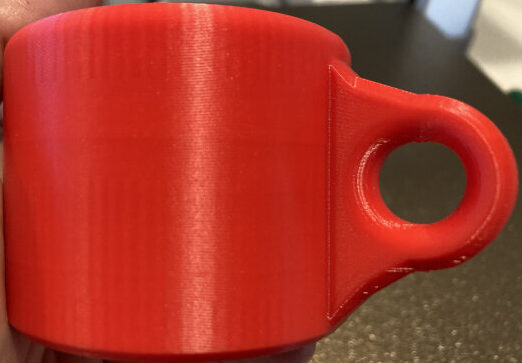
I made it thicker, beefed up the infill and other slicer settings, and so forth. I think it looks better than store bought.
The “top anchor” is good. I didn’t bother replacing it.
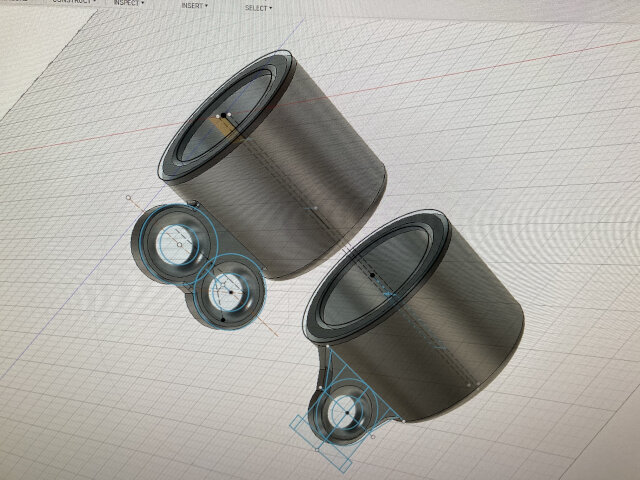
I started with the “middle anchor” which is for the bottom of the top flag and also the top of the lower flag, it has two anchor points. Here it is in Fusion 360.
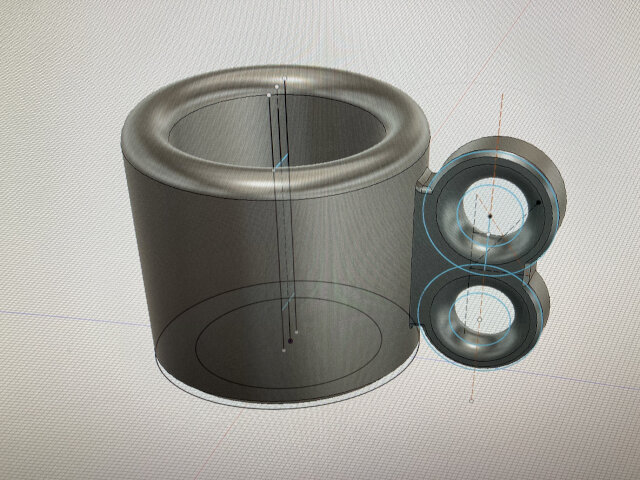

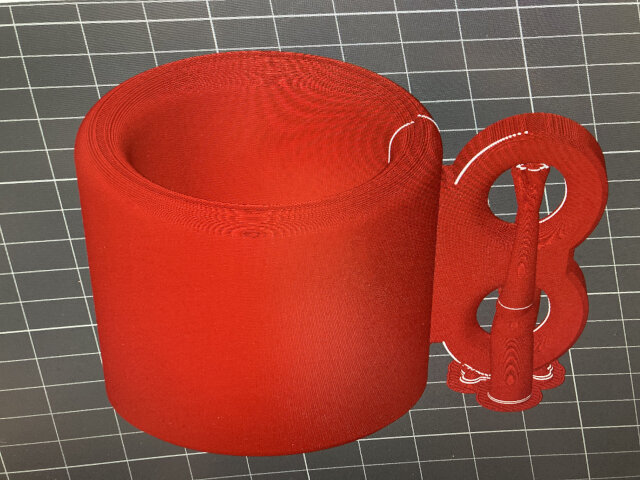
Here it is in the slicer. (Notice the “tree” supports that hold up the “overhang” on the two loops.)
Here it is in real life.
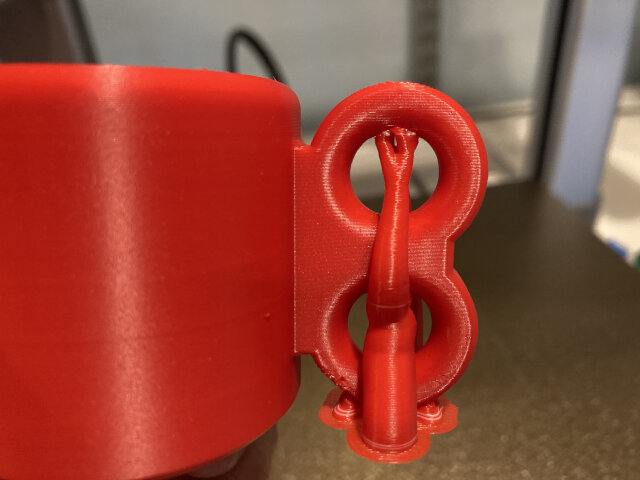
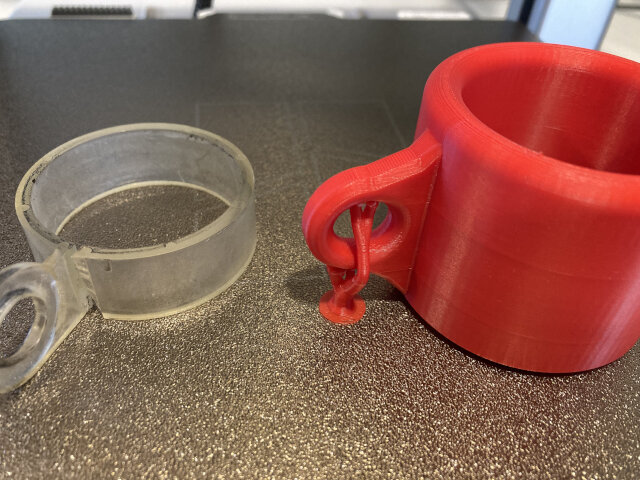
Here it is in real life next to the broken part.

Then I realized the bottom anchor was shot too.

It took measurements off the broken part and made a bottom.
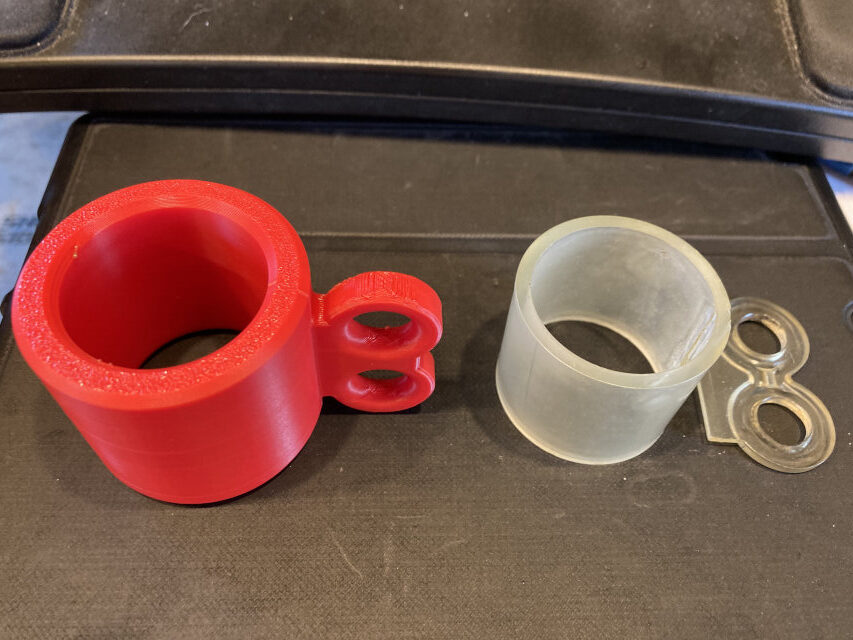
Here’s the set of two objects.
Here’s the new part next to the old broken part.

I also made a rookie mistake! Never measure the part that broke, measure the environment into which it must fit! The part came out about 1 mm too small to slide onto the flagpole.
All the cursing in the world wont add a millimeter so I redrafted with a generous 3.5mm tolerance and reprinted. This isn’t exactly a tragedy. According to my slicer, the “bad part” cost about $1.41 to make. Tossing a buck fifty ain’t my favorite thing but it’s not the end of the world. It also means the total repair was a little under $4.50 even with my rookie mistake.
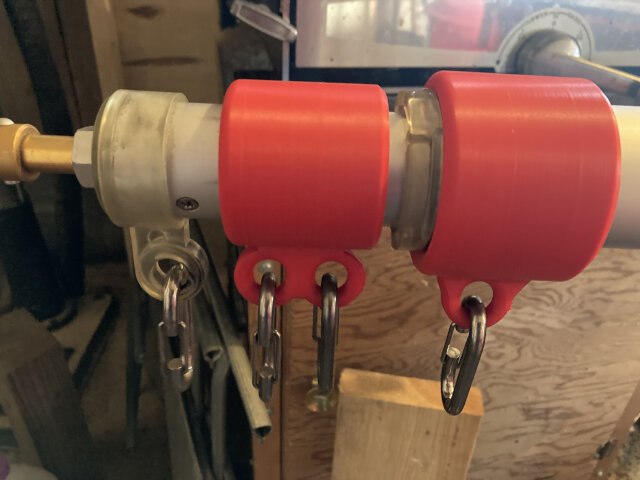
Here’s what the flagpole looks like with the new parts installed.
I got my motorcycle running and was going to ride to town to buy a new flag, but I’m still fighting some ailments. I wasn’t feeling up to it. I rode to the nearest gas station, bought a tank of gas for the bike, and scampered home.
A few days later I was in better shape. I went to town and bought myself a super nice flag. (I bought mine locally and not on Amazon, but I spent about that much on it.)
I think it looks glorious. (Note the lower “swivel”. I’ll put it to use when I get my next “lower” flag.)


Epilogue:
Naysayers abound. IRL I had a bunch of people insist my $4.50 worth of plastic ingenuity is surely more expensive than buying parts. I did a search and found this:
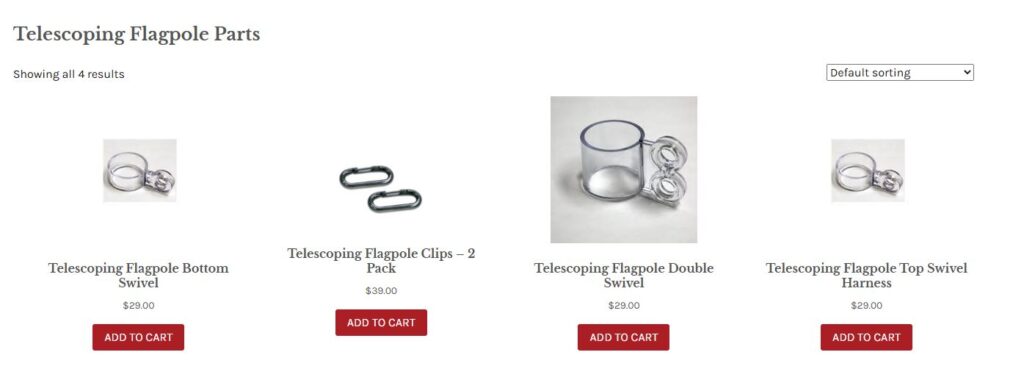

Ha! I’d have paid $58 (plus shipping). It does look like an exact replacement. Now I’m extra special ultra mega pleased with my <$5 construction.
Printing hardware ain’t free, but saving $50 on a small job is pretty sweet. I imagine it’ll pay for itself in due time.